RMS Aurania III (1924-61)
The RMS Aurania was the third Cunard vessel to bear the name
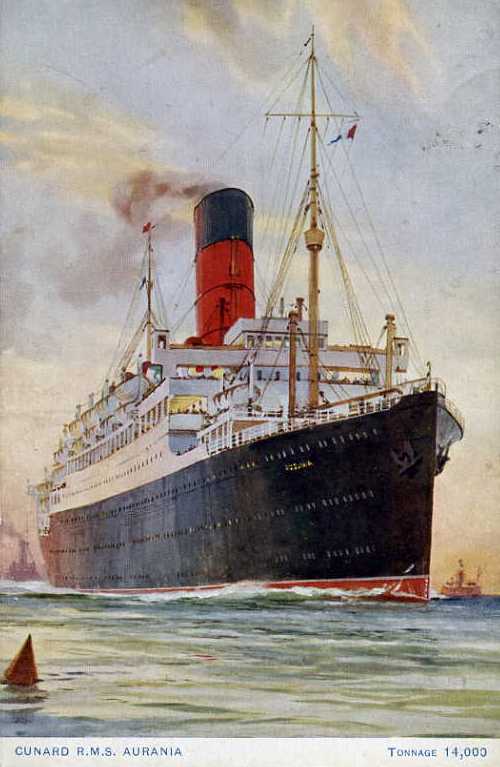
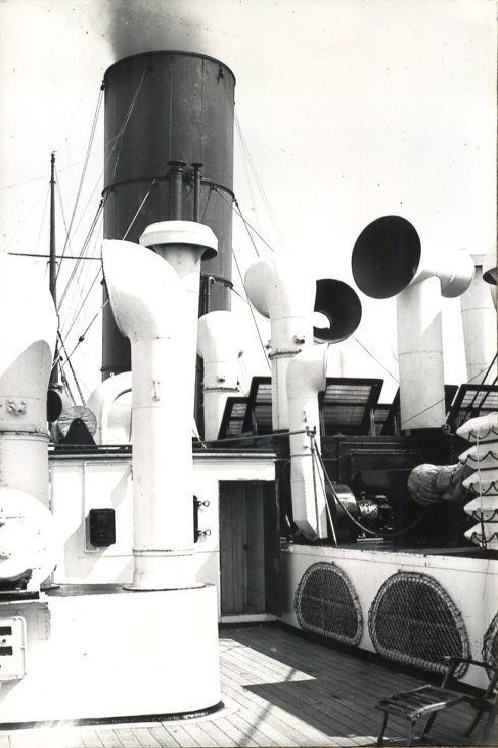
Cunard launched a second trio of intermediate liners in the 1920’s; these were the Aurania, Alaunia and Ascania. As part of their post-war building programme Cunard built three 14,000 ton liners which were all oil fired and driven by double reduction geared turbines. The Aurania was built on the Tyne at the shipyard of Swan Hunter & Wigham Richardson on the same slipway as the Mauretania. Built specifically for the New York service, she was the second of the three to be launched, on the 6th February 1924. Completed on the 6th September she sailed for a trial passage round the north coast of Scotland, however, with thick fog lying between Duncansby Head and the Orkneys, she had to anchor off Wick Harbour for almost 24 hours. She finally arrived in the Mersey on the evening of Tuesday the 9th September and made her maiden voyage, from Liverpool to New York, on 13 September.
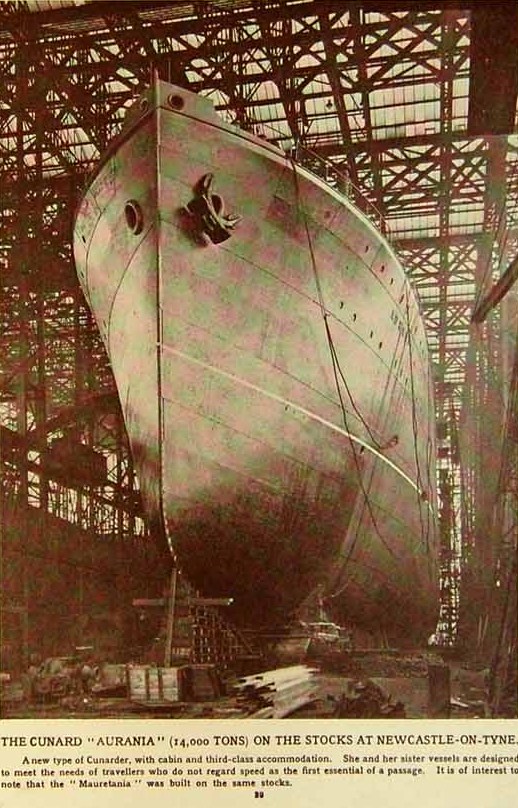
A promotional newspaper showing the Aurania on her stocks at the Swan Hunter shipyards in 1923.

The stern of the new Aurania at Swan Hunter

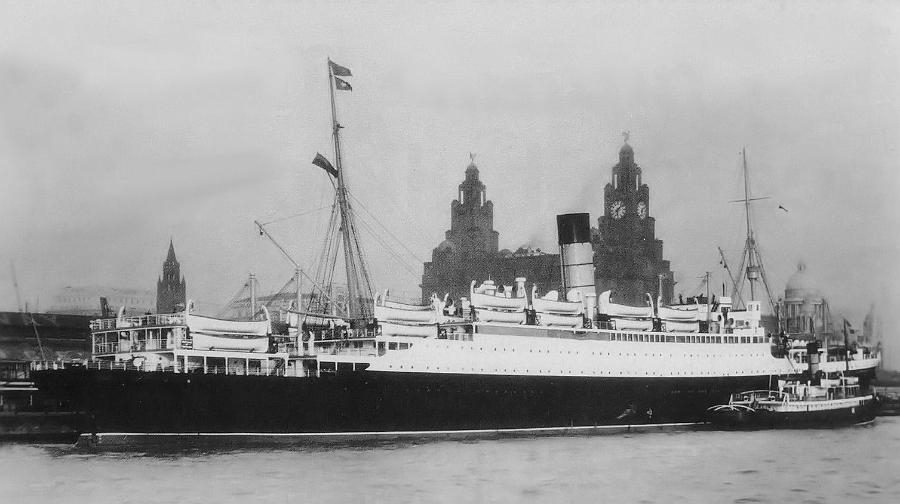
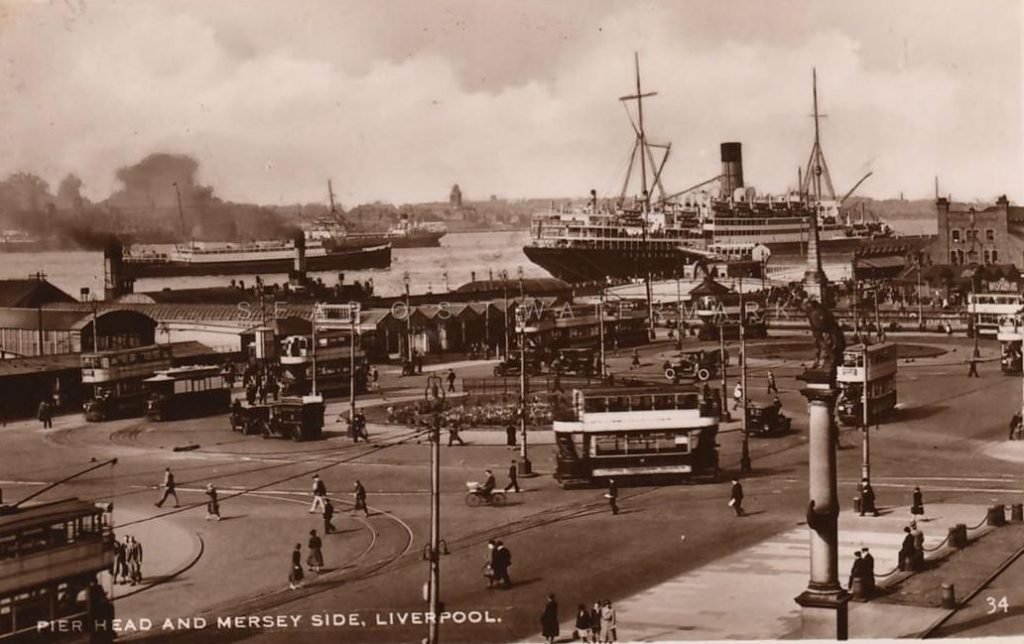
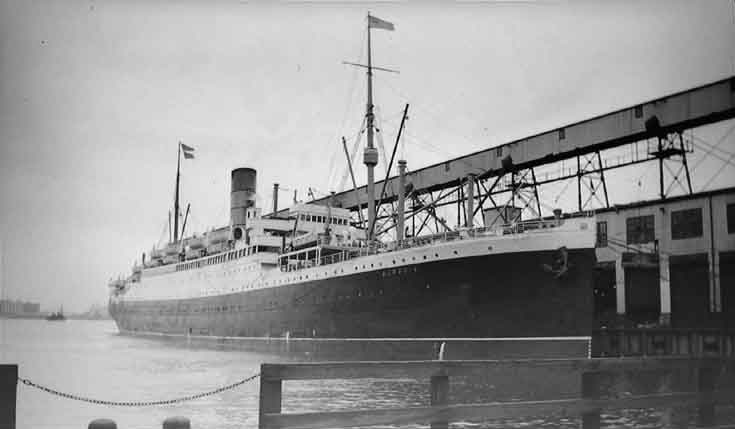
The RMS Aurania at Liverpool in 1924
Another photograph of RMS Aurania in 1924
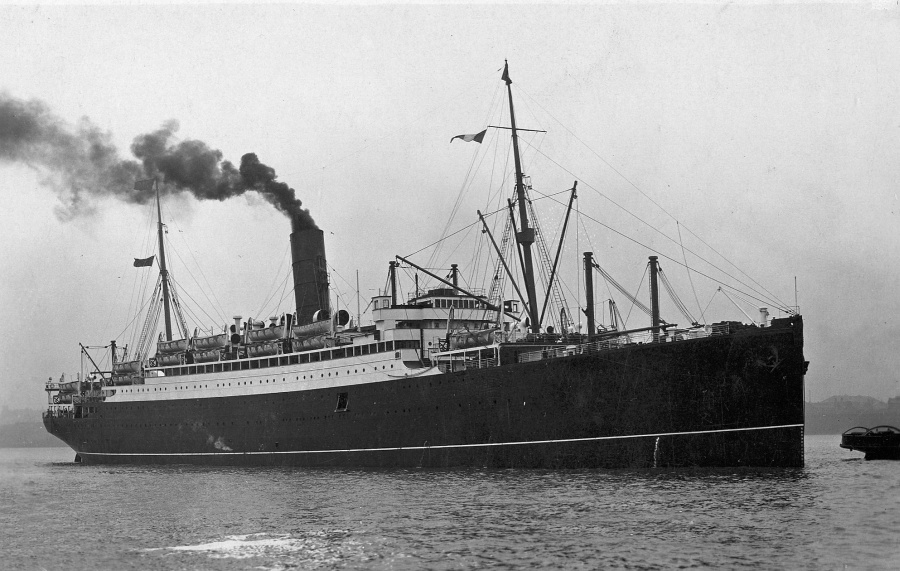
The RMS Aurania in 1924

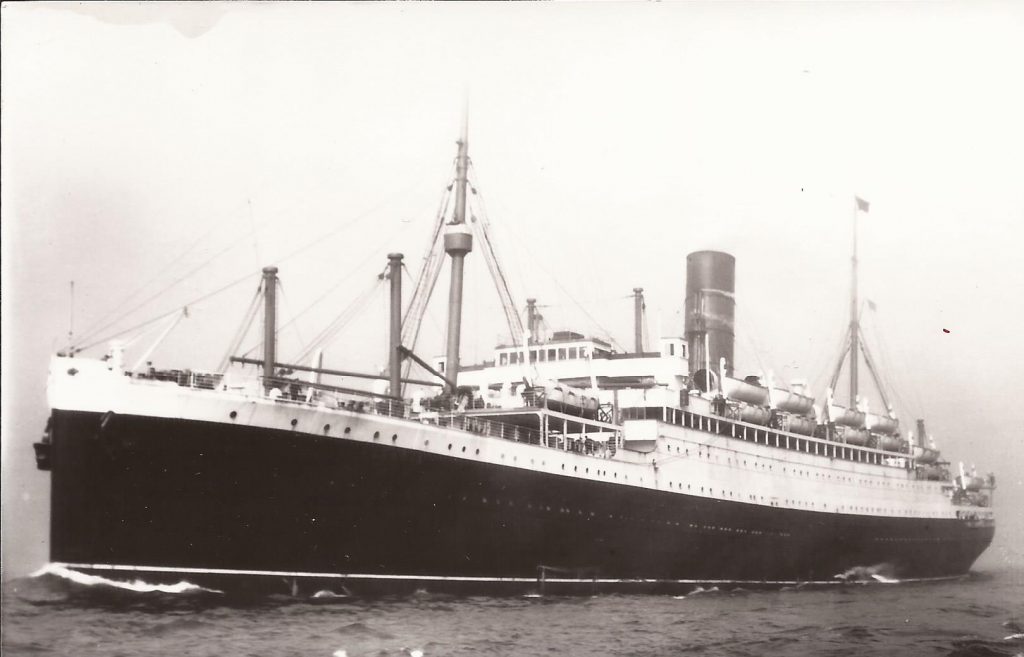
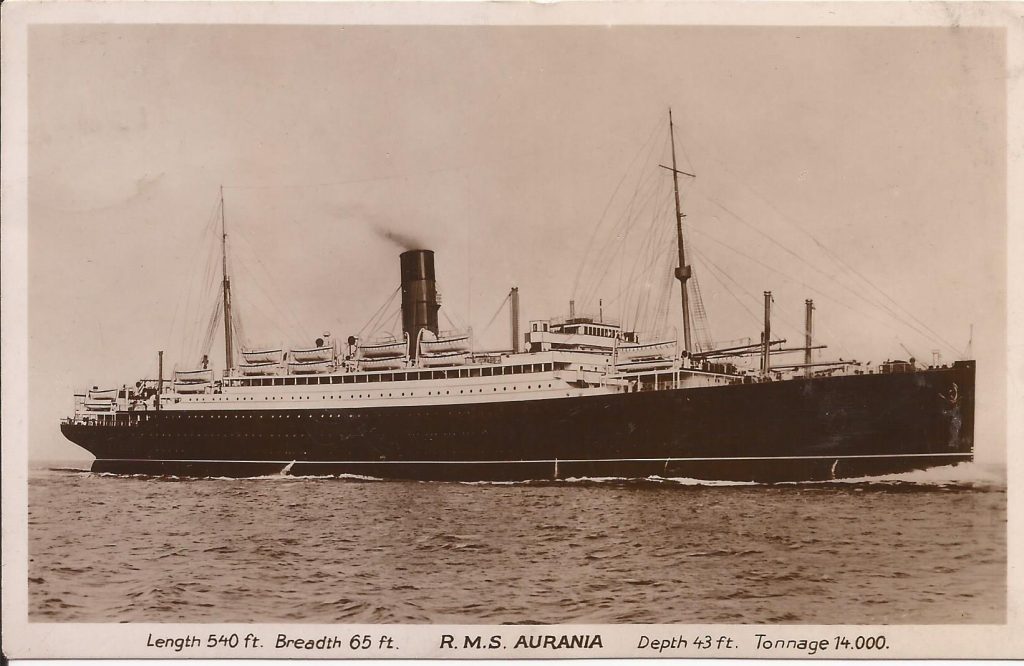
A postcard photograph of RMS Aurania in the early 1920’s
A postcard photograph of RMS Aurania in the early 1920’s
As with all the other ‘A’ Class liners, the Aurania had accommodation for between 400 and 500 cabin class and approximately 1,000 third class passengers and while she did not pretend to rival the luxury of the big express liners, the Cabin Class public rooms on A deck were spacious and comfortable. Forward of the main staircase was a winter garden lounge and aft of the staircase was a smoking room and a gymnasium. There was also a children’s nursery and a long gallery and drawing room. The Third Class passengers were well catered for with two berth cabins and several recreation rooms including a lounge and smoking room.
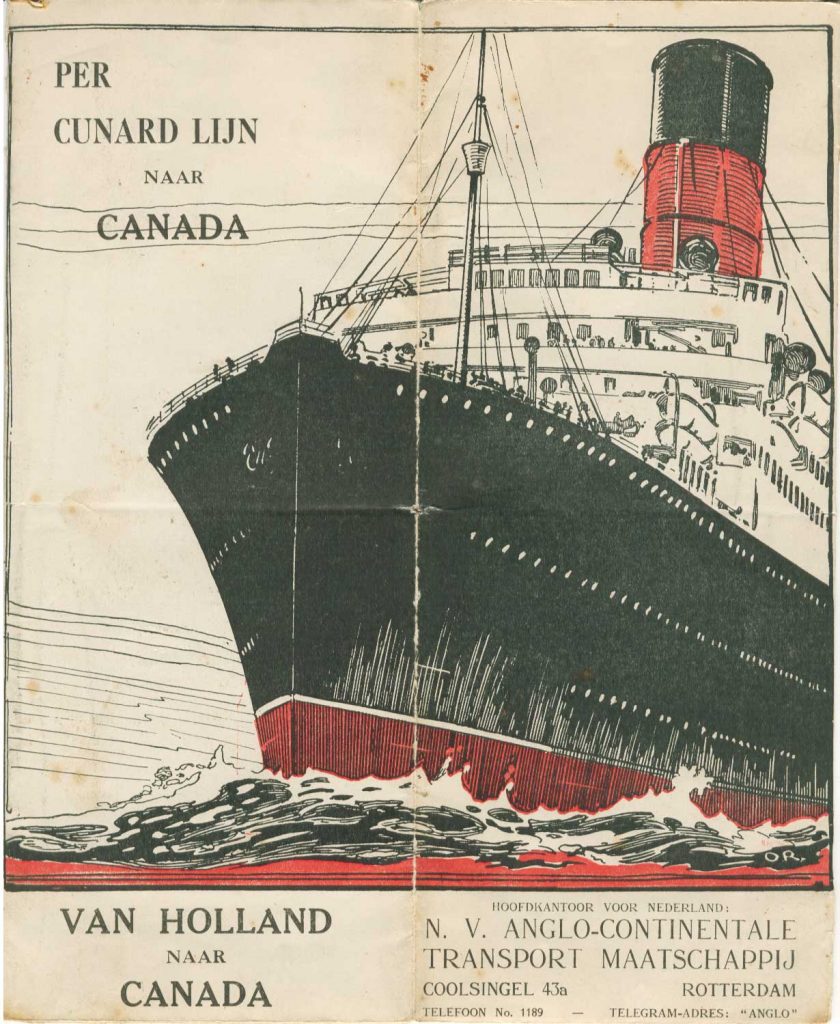
The front cover of a promotional brochure for the RMS Aurania in the early 1920’s

Taken from the promotional brochure for the RMS Aurania, a Third Class two berth cabin
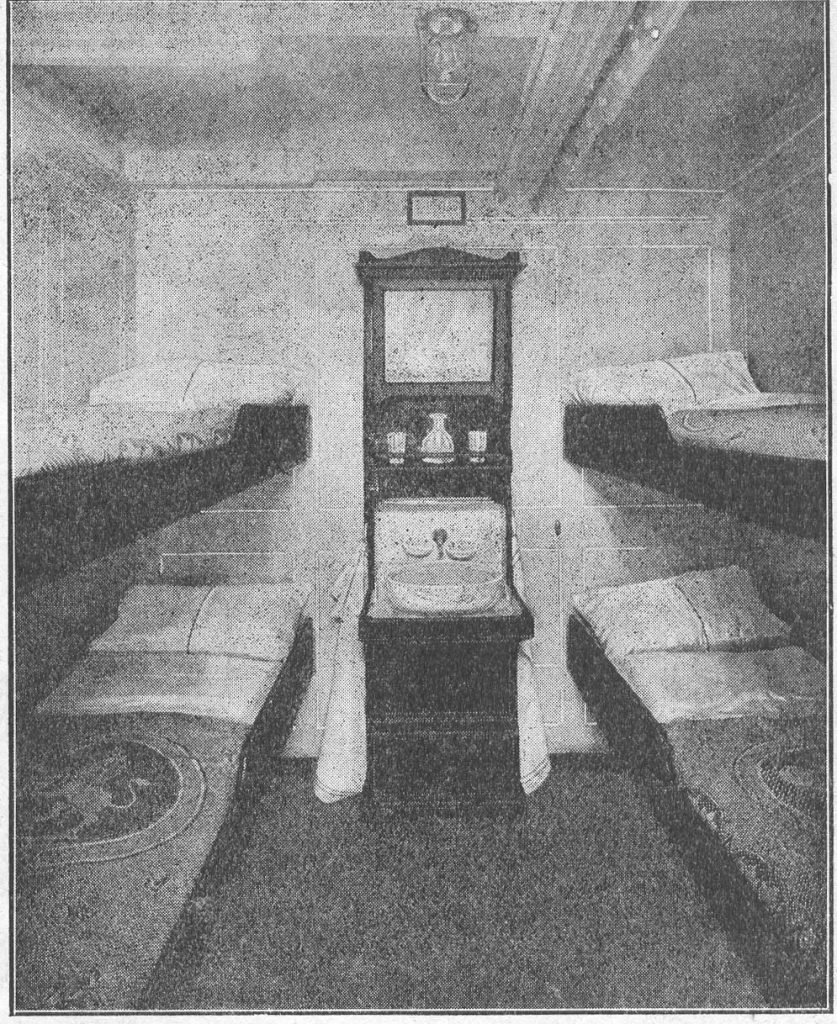
Taken from the promotional brochure for the RMS Aurania, a Third Class four berth cabin
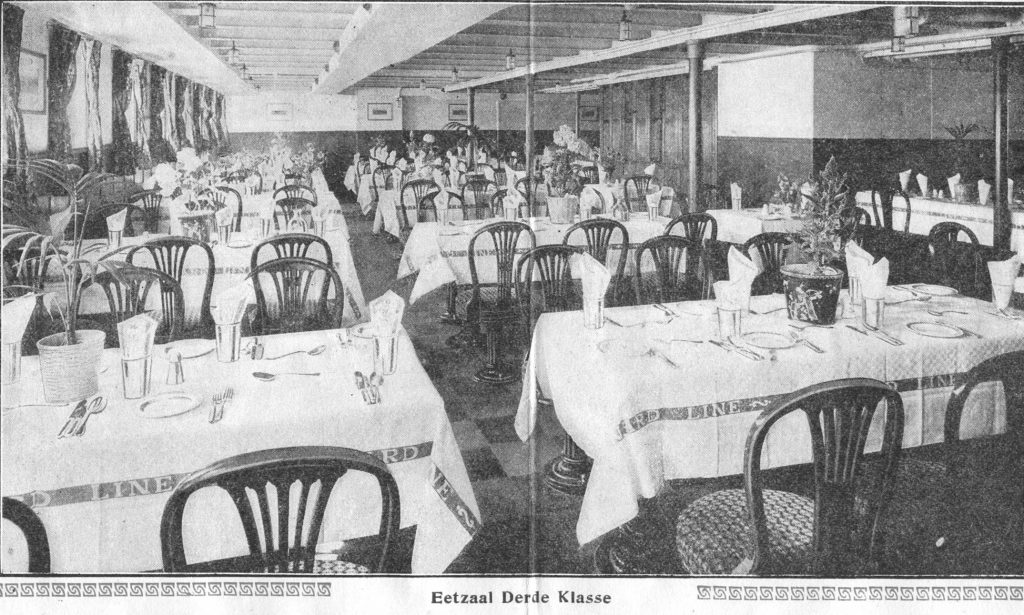
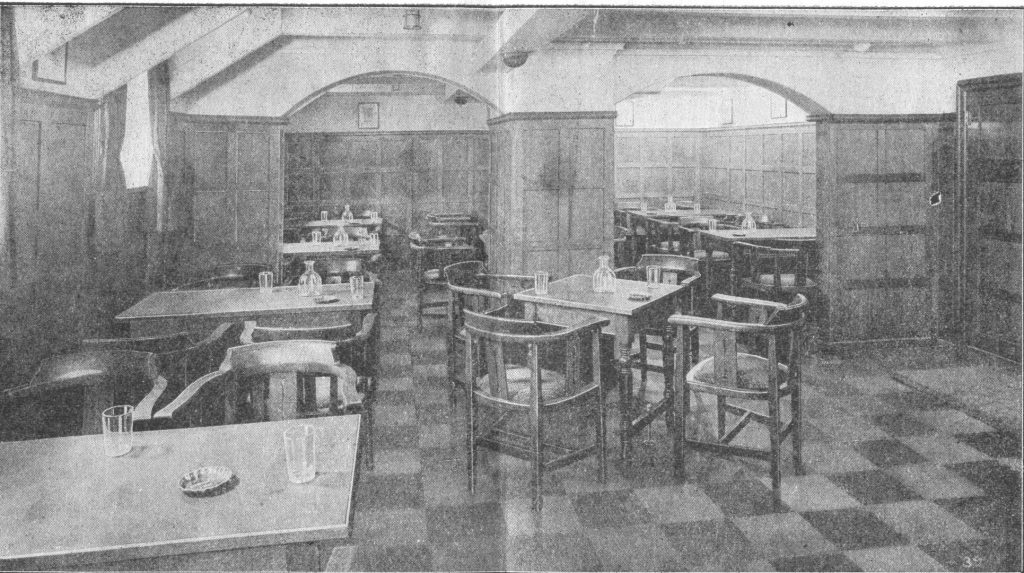
Taken from the promotional brochure for the RMS Aurania, the Third Class dining room
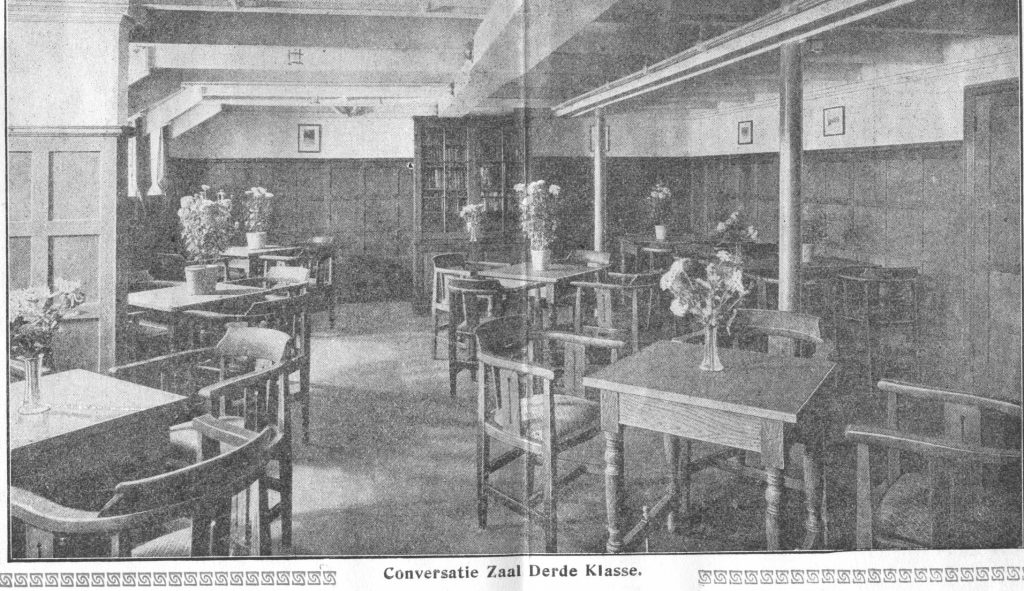
Taken from the promotional brochure for the RMS Aurania, the Third Class conversation room
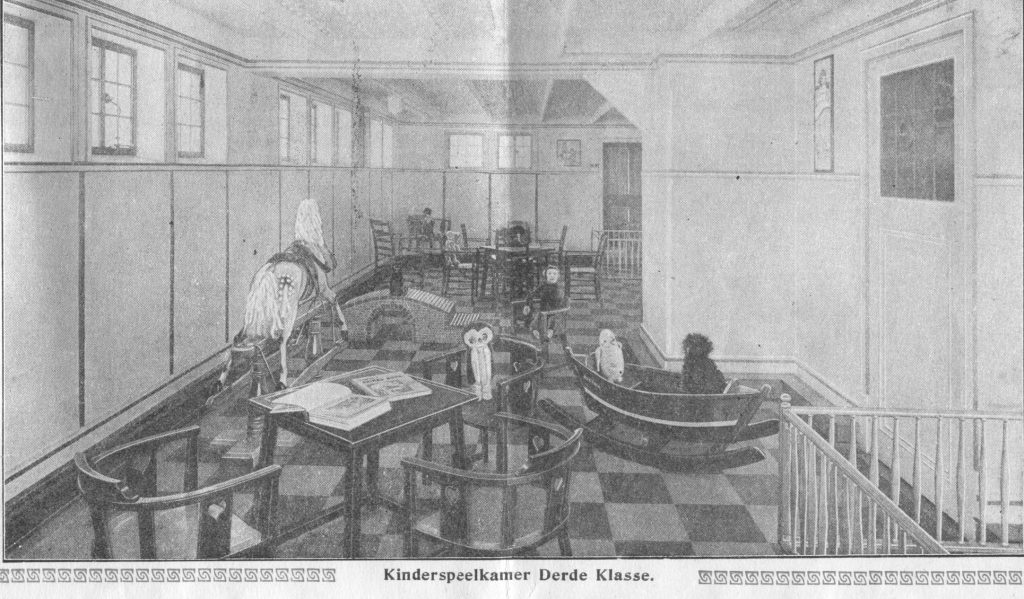
Taken from the promotional brochure for the RMS Aurania, the children’s playroom
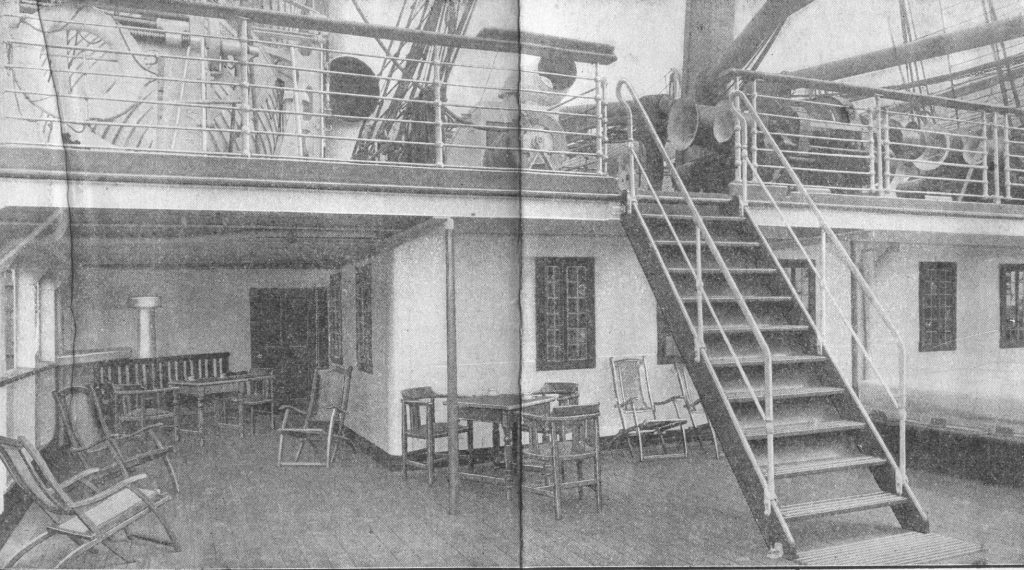
Taken from the promotional brochure for the RMS Aurania, the Third Class promenade deck
Taken from the promotional brochure for the RMS Aurania, the Third Class smoking room

A promotional postcard from the RMS Aurania, showing the Third Class rooms
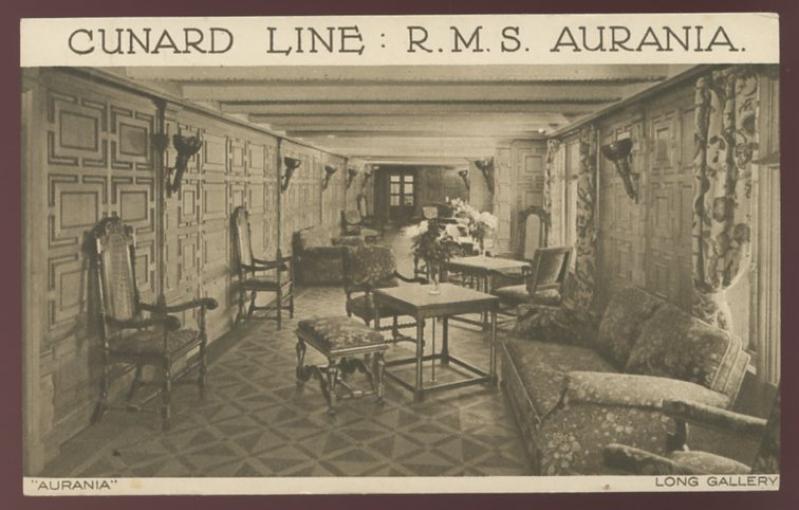
A promotional postcard from the RMS Aurania, showing the Long Gallery
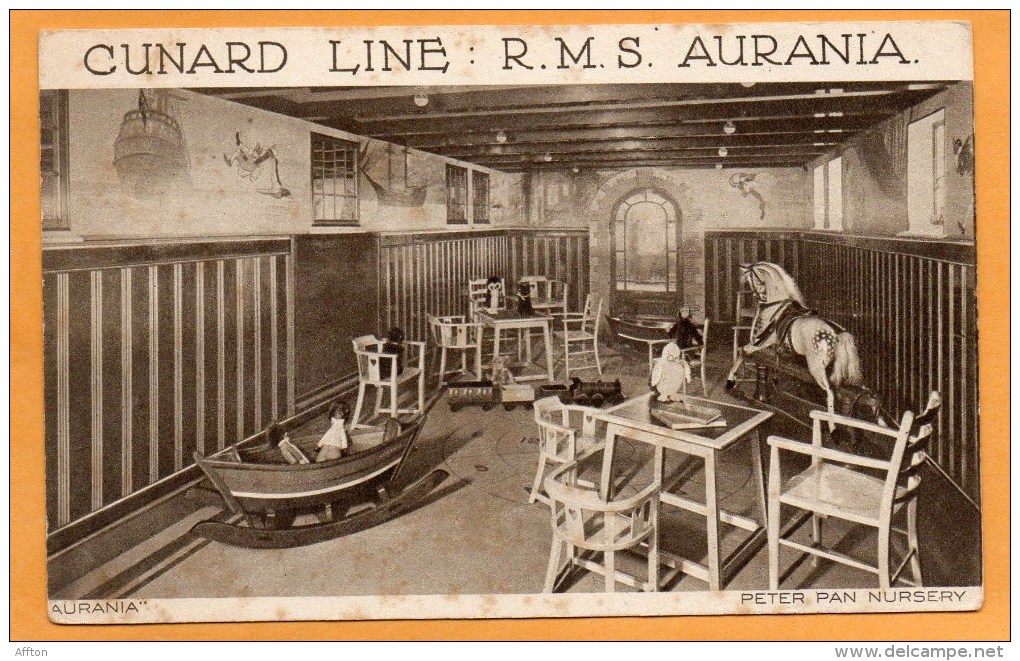
A promotional postcard from the RMS Aurania, showing the Peter Pan Nursery
In April 1925 the ship switched to a new route and now went from Liverpool to Quebec and Montreal. By June 1927 it was decided that the passenger accommodation should be more diverse and as a result the ship was refitted so that she could cater for three classes of passenger, Cabin, Tourist and Third Class.
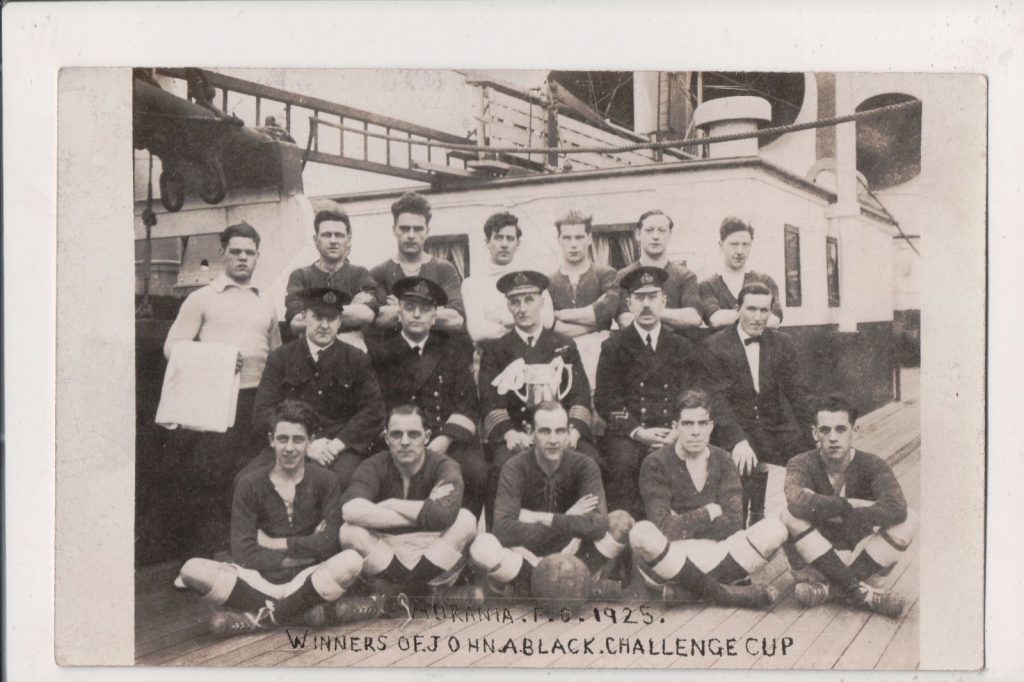
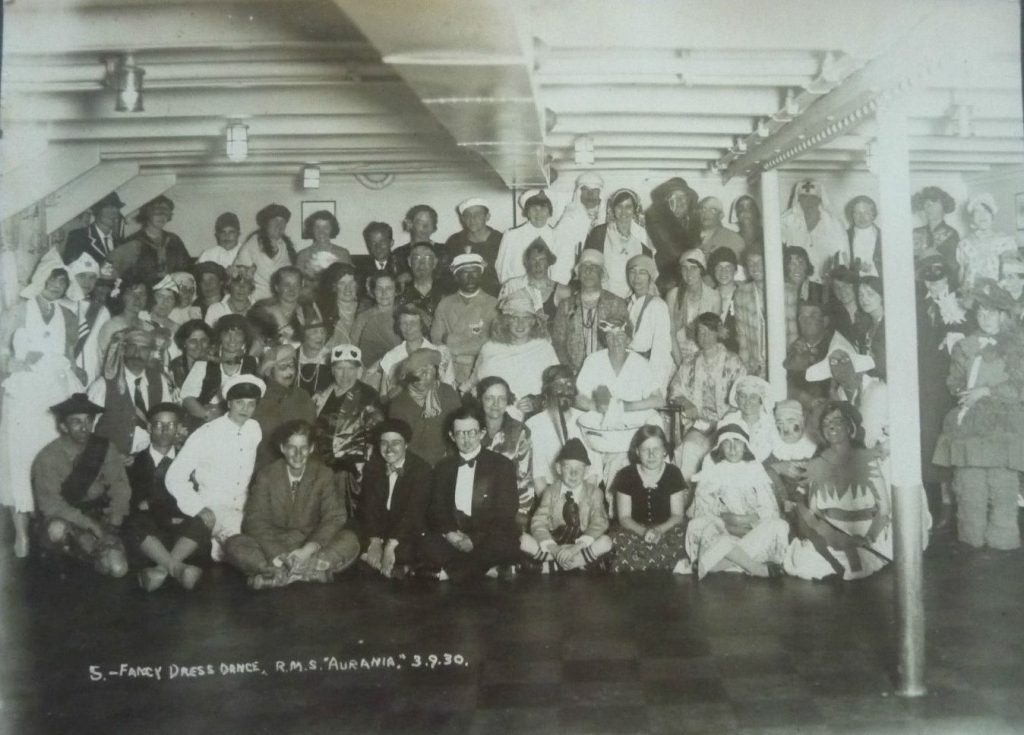
Winners of the John Black Cup seen here on board RMS Aurania in 1925
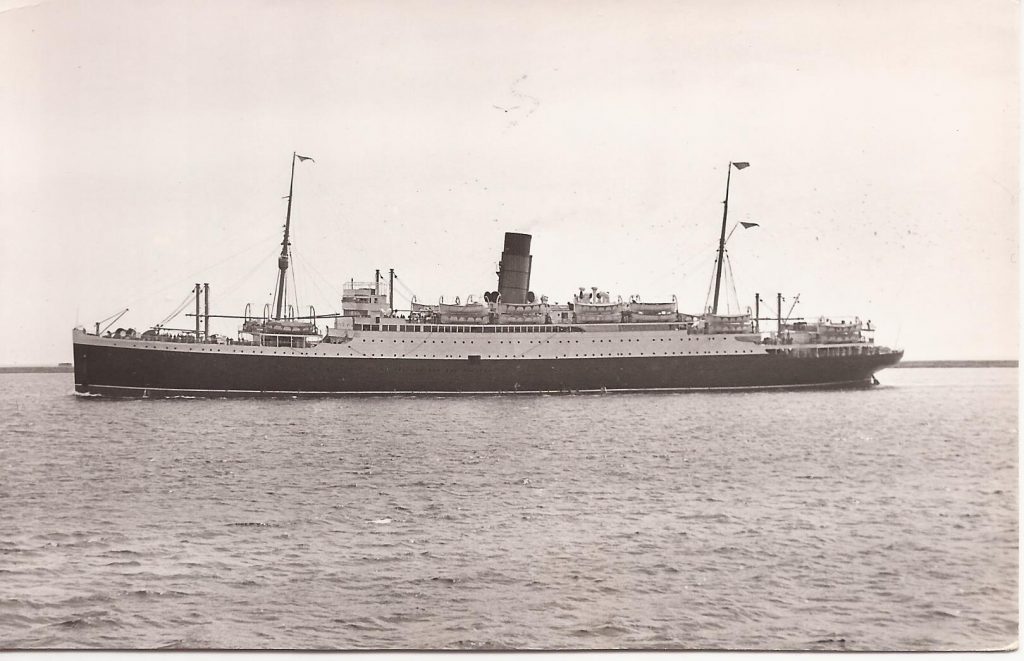
The RMS Aurania at Liverpool in 1926
The RMS Aurania at Liverpool in 1926
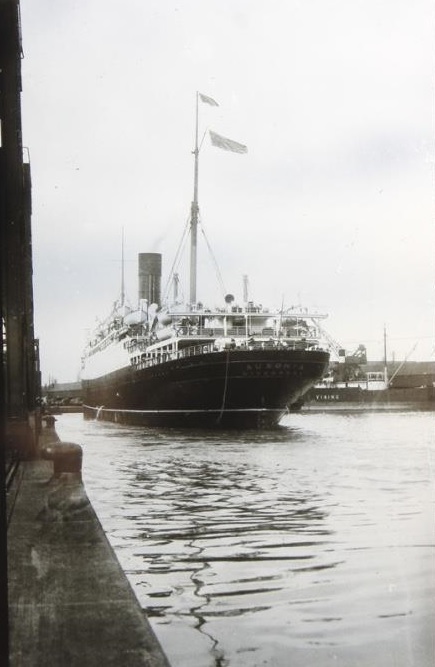
In 1928 the Aurania’s route was changed again, still sailing to Quebec and Montreal, but now from Southampton. Many of her passengers were emigrants from Estonia, Lithuania, Latvia or Poland, seeking a new life in Canada, but before crossing the Atlantic, she would call in at Le Havre to pick up additional passengers and mail.
On the return voyage, she would stop at Plymouth, then Southampton before going onto the Commercial Dock in London where she would discharge a small cargo of grain from Montreal and take on supplies ready for the next voyage; she continued to serve this route until the outbreak of World War II.

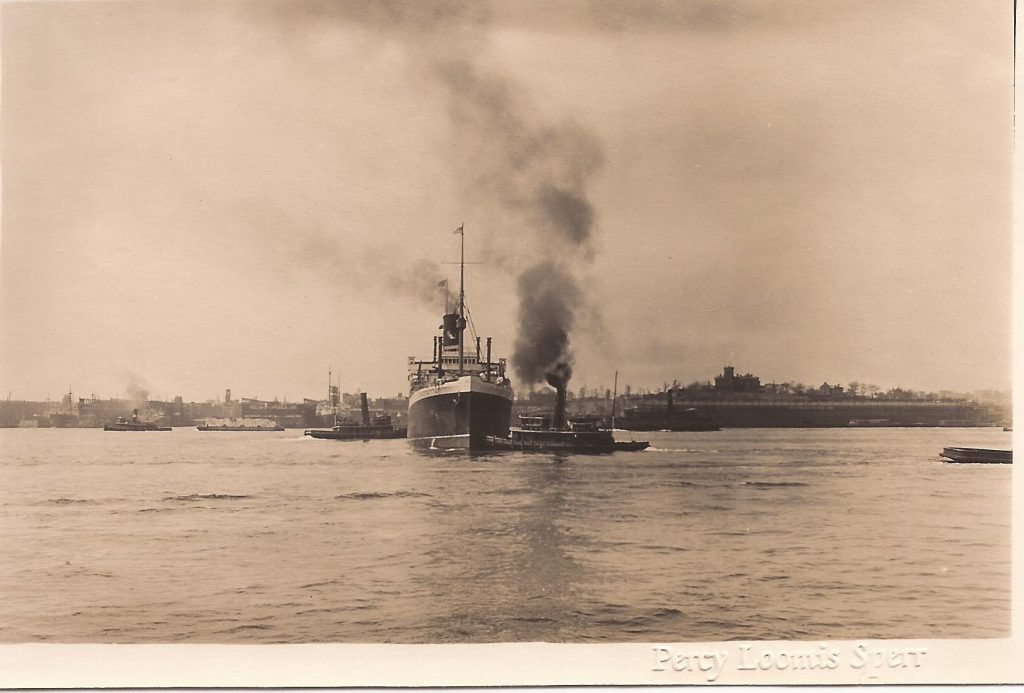
The RMS Aurania in the 1920’s

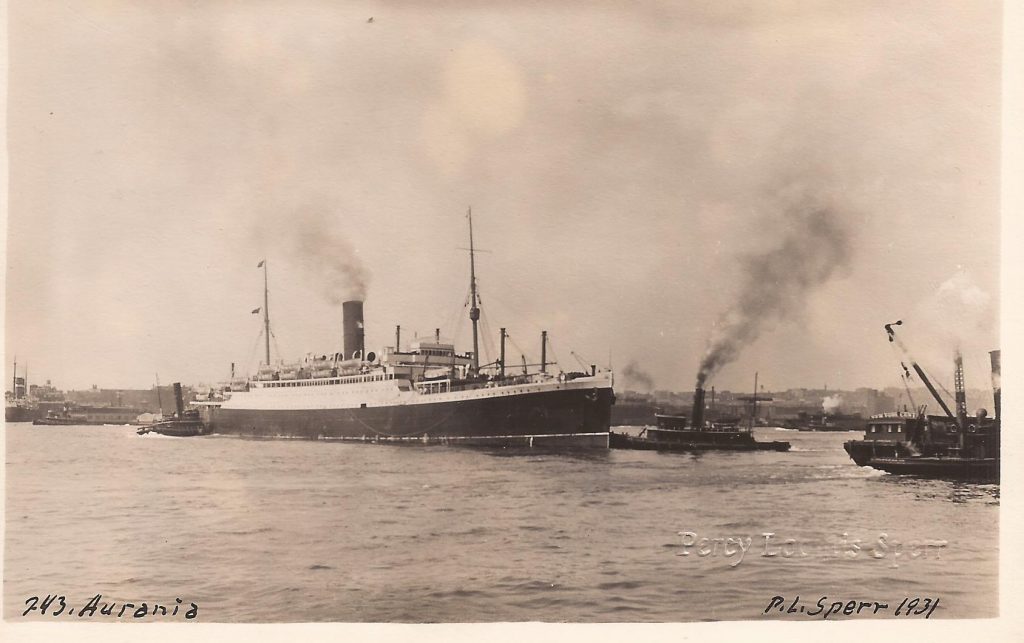
A publicity photograph of RMS Aurania in 1931
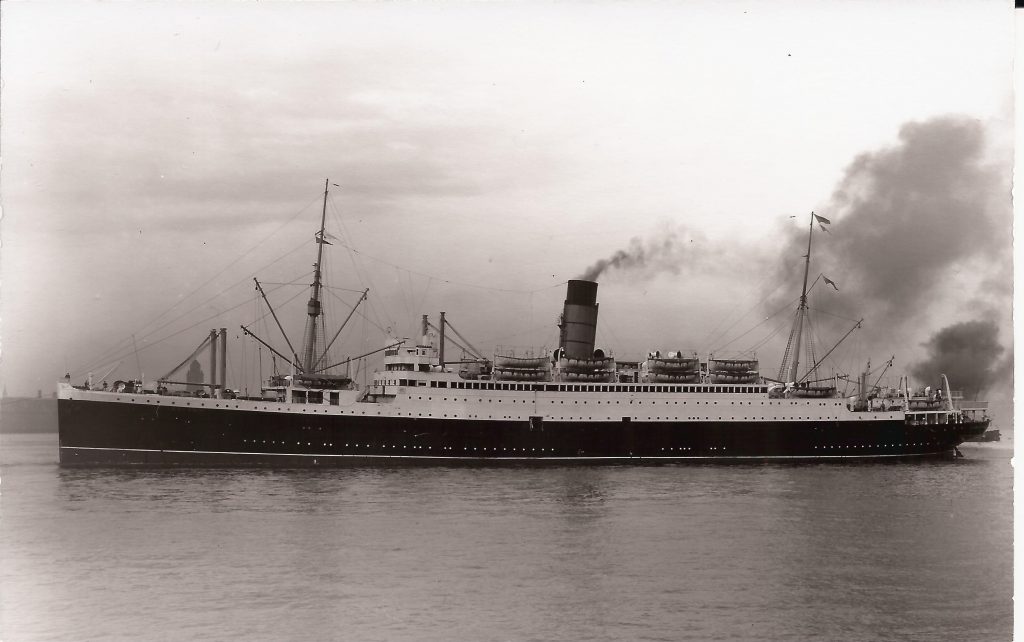
RMS Aurania seen here at Plymouth on 12th September 1933
The RMS Aurania at Boston Docks in 1937
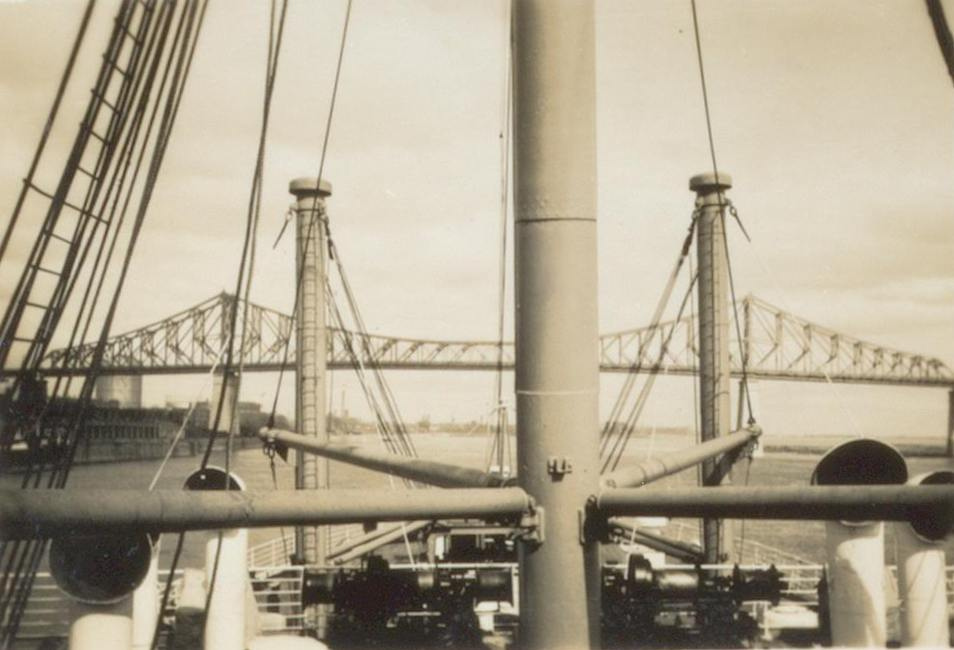
The RMS Aurania going under the Quebec Bridge in 1938
The Aurania flew the blue ensign which indicated that the officers were members of the Royal Naval Reserve, something which was quite a prodigious acclaim and a much sought after honour for the liner companies wishing to establish an aura of perfection.
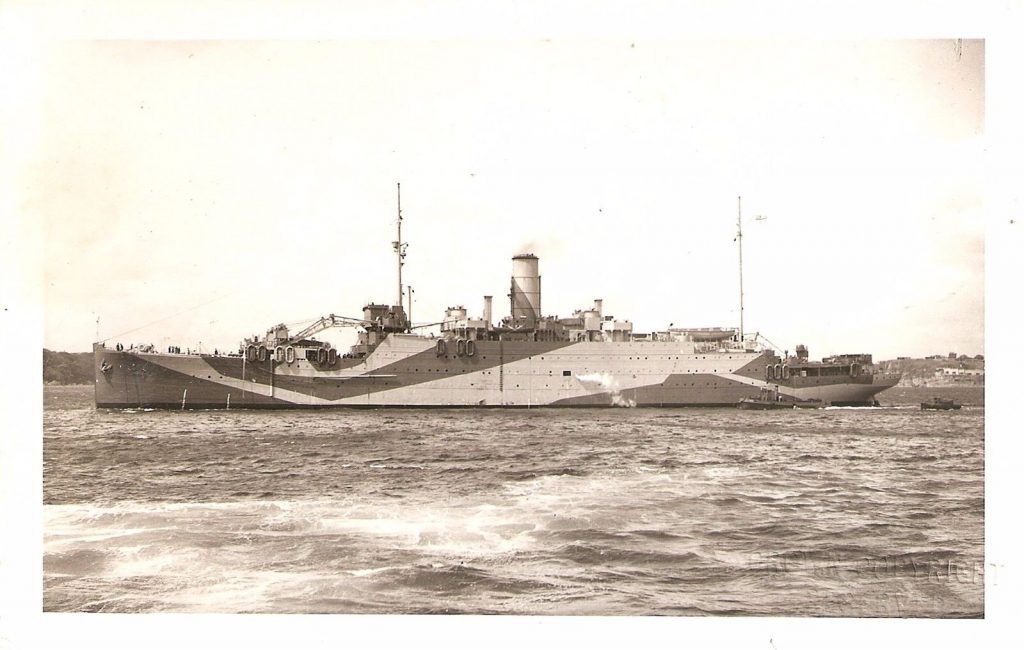
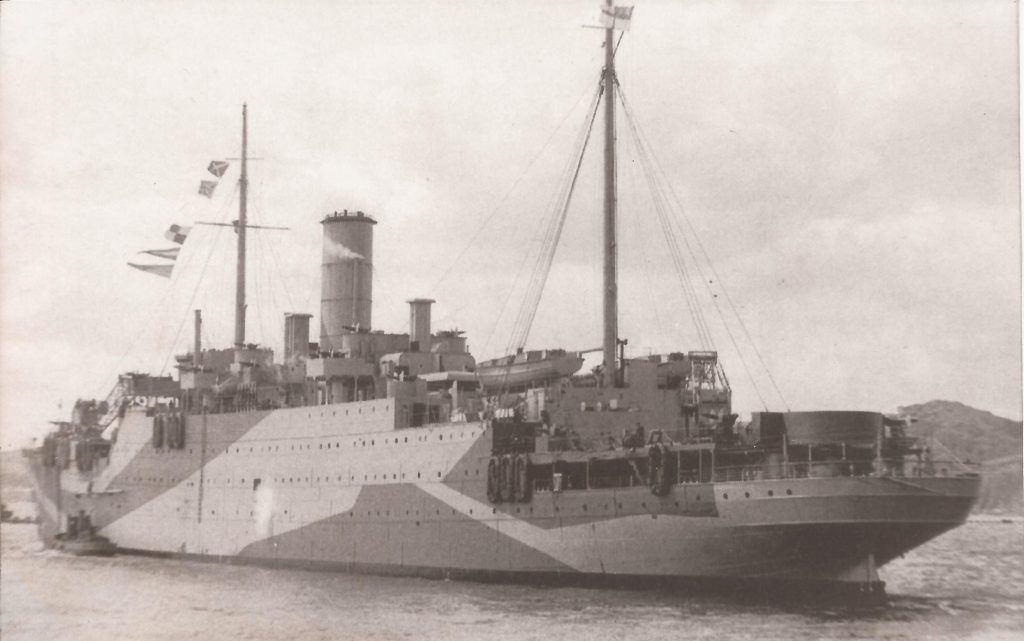
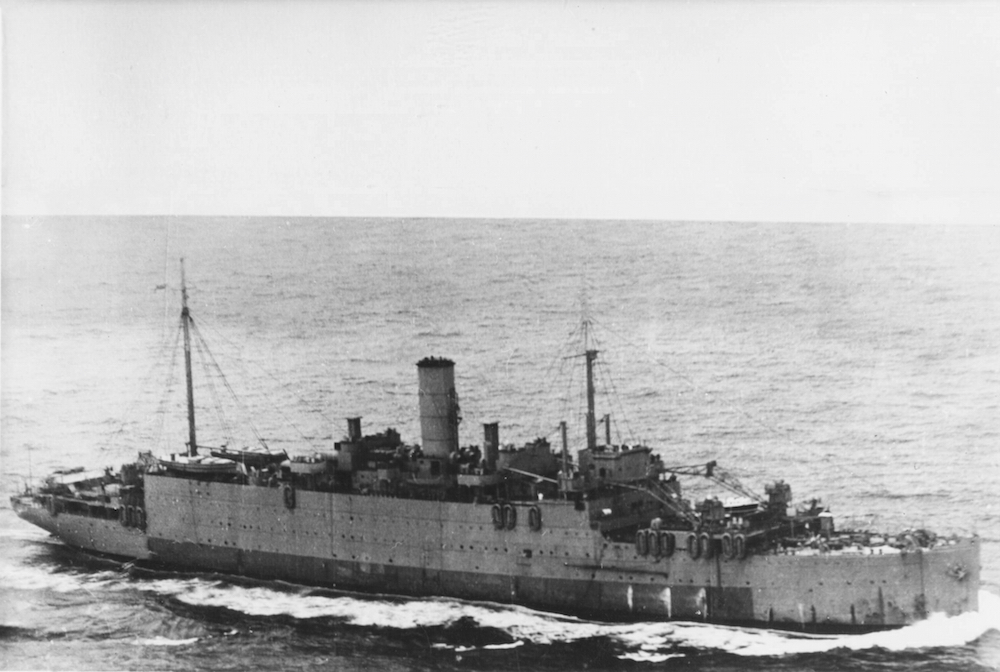
On the 29th August 1939, the Aurania arrived on the Thames and was immediately requisitioned by the Admiralty. After being converted for service as an armed merchant cruiser she was commissioned into the Royal Navy on the 15th October and sent to join the Northern Patrol. She remained in this theatre until April 1940 when, after a refit, she joined the Halifax Escort Force.

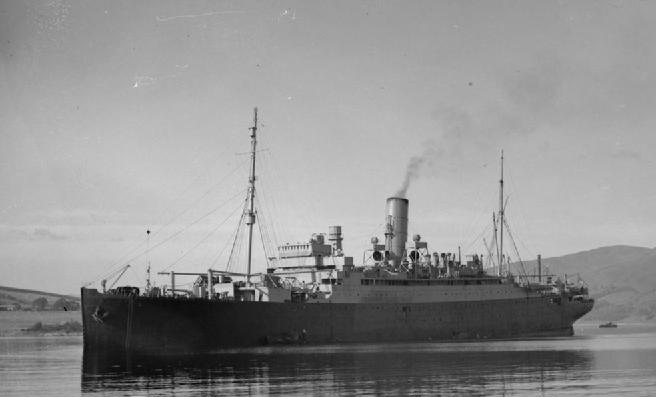
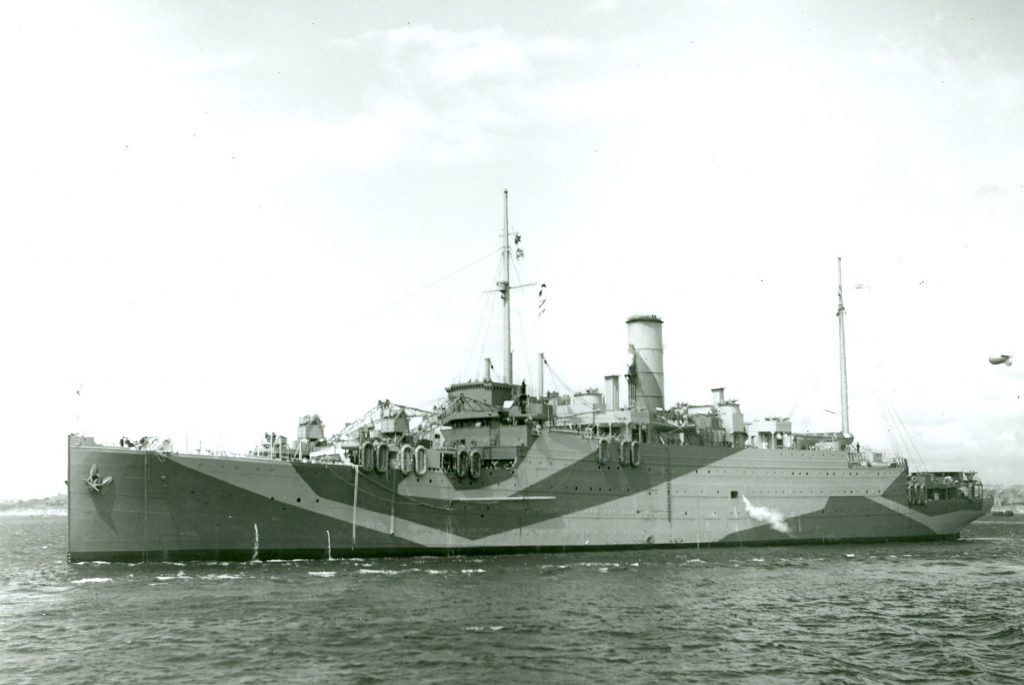
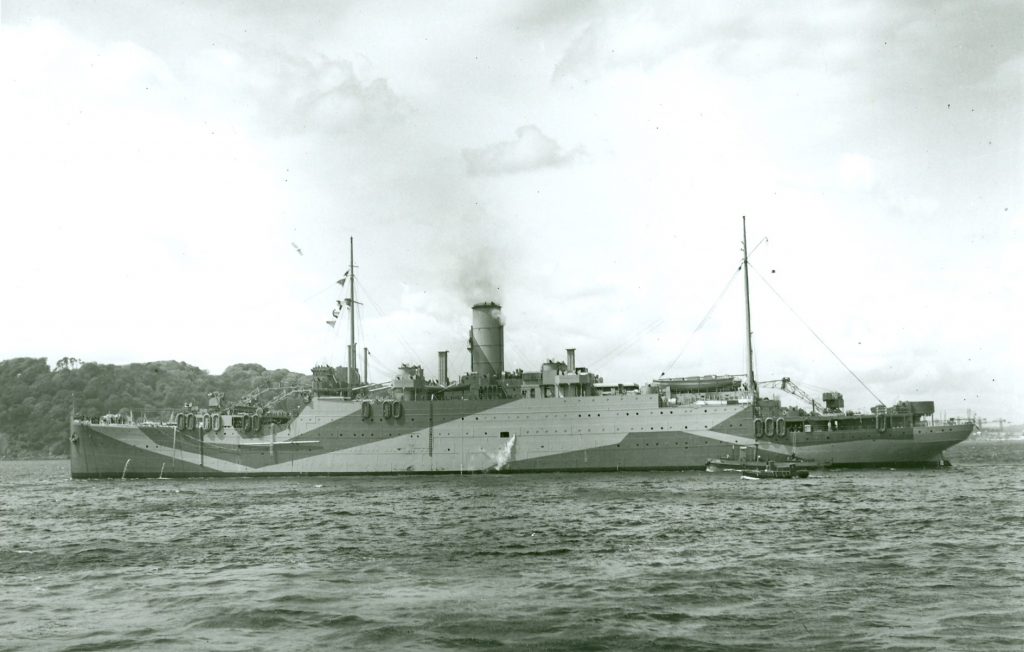
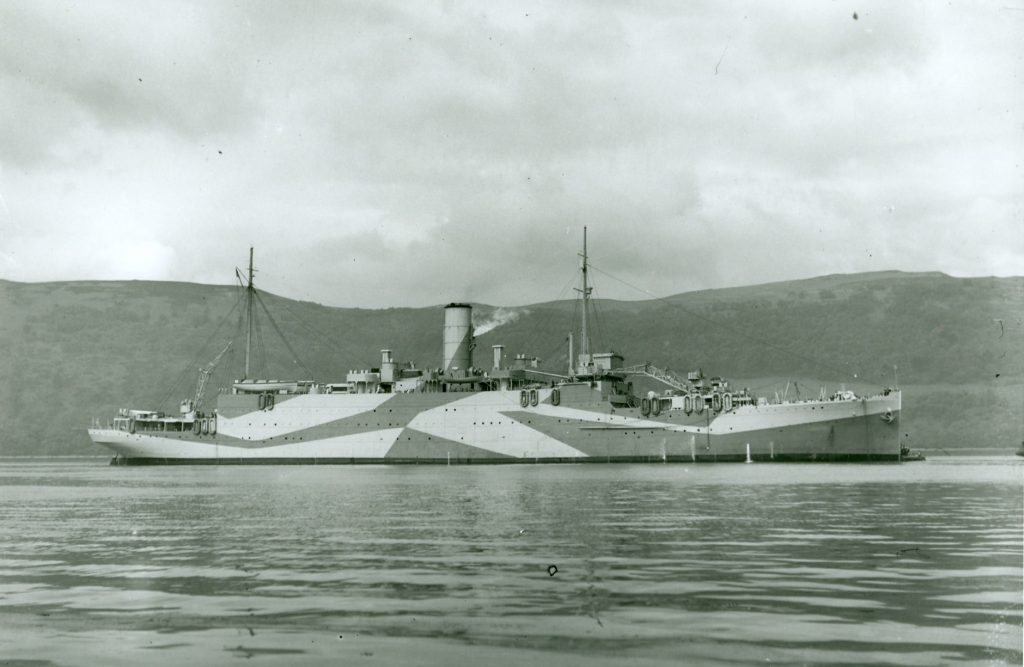
The HMS Aurania in 1941
At 1050 am on the 12th July 1941, HMS Aurania left her anchorage off Sydney, Cape Breton, as escort for a Reykjavik bound convoy. By 8 pm the next evening there were icebergs in sight and the following morning she took up station ahead of the convoy. By 3.30 pm she was passing through a field of loose ice and thick fog banks and an hour later she was passing large icebergs as close as six cables to her. At 7.30 pm the forecastle lookout was doubled and 16 minutes later, as Aurania emerged from a fog bank, a large iceberg loomed up ahead.
Despite putting the engines full astern and the wheel hard to port, at 7.20 pm she hit the ice berg bows on. She was in a position of 51° 49’N/55° 50’W, off the coast of Labrador and she immediately signalled the convoy to stop. The whole convoy remained stationary until midnight before moving ahead cautiously once again. At daybreak on the 15th July the remainder of the convoy continued on its original course while the Aurania made her way slowly to Halifax NS, where she anchored on the evening of the 17th. The next day she went alongside berth 39 and after disembarking the RAF personnel on board and discharging her cargo of fruit, she left Halifax for Newport News in the United States for repairs.
HMS Aurania completed her repairs on the 12th September 1941 and two days later, after taking on ammunition in the Hamplin Roads, she left the USA for Halifax, via Bermuda. She arrived back in the Canadian port on the 26th September and 17 days later, on Monday the 13th October, she sailed from Halifax for the Clyde, steaming in a convoy of HM ships which included the AMC’s Wolfe, Ranpura and Maloja. By 2.27 am on Tuesday the 21st October and convoy was in a position 50° 48’N/18° 41’W when a torpedo hit HMS Aurania on the port side forward. The ship took a 25 degree list to port so her captain turned to starboard in an attempt to get away from the submarine, the listing decreased and speed was increased to 12 knots.
However, from somewhere in the ship the order ‘abandon ship’ was circulating when in fact the captain had only ordered ‘turn out the boats’. Lifeboat P2 was lowered with five occupants and was severely damaged when it hit the water as the ship was still under way and had to be cut adrift. Although thrown into the sea by the impact, four men were picked up by HMS Croome, which had been detached to search for survivors. Another crew member from Aurania was also lost at this time when he fell overboard while preparing the ships cutter for use in case it should be needed. It was not known who had ordered the ship to be abandoned, but it could have been disastrous as the engine and boiler rooms were left unattended. Fortunately the engineering officer of the watch realised that the captain intended to go on steaming and he remained below until he was re-joined by the others.
Although HMS Aurania had been badly damaged on the port side between No’s 2 and 3 holds, she was not on fire and the lighting system and pumps were working, so there was every chance of getting the ship back to the Clyde. Once daylight came, Hudson aircraft of Coastal Command kept a continuous reconnaissance overhead and at 3.45 pm on the 23rd October, HMS Aurania anchored in Kames Bay off the island of Bute.
The attack on HMS Aurania on the 21st October was claimed by the German U-boat, U-123, which had fired a spread of three torpedoes at the group of five AMC’s which had been trailing the SL89 convoy. The U-boat report differs to the Aurania’s action report in that it claims that two torpedoes hit the Aurania, one forward on the bow and a second underneath the bridge. Following the attack, U-123 was pursued by the convoy escorts and retreated from the area, but the following morning at 10.09 am it came across the Aurania’s sinking lifeboat and rescued Leading Seaman Bertie Shaw, taking him back to Germany as a POW. Bertie was interrogated on his capture and it seems that he was able to convince them that the ship had been sunk, thereby possibly saving the Aurania from complete destruction.
HMS Aurania lying safely at anchor at Rothesay after a German propaganda broadcast had erroneously claimed that she had been sunk. The photograph was taken by Lieutenant J.A. Hampton who was a Royal Navy official photographer at the time. (Copyright Imperial War Museum)
In November after salvage teams had cleared her holds, the Aurania was moved into a floating dock at Rothesay Bay for repairs. She remained there until the 12th February 1942 when she was refloated and anchored off Greenock. By this time there was an urgent need for heavy repair ships and the Admiralty purchased the Aurania from Cunard and moved it to Devonport to be converted for this role. She arrived alongside No 5 berth at Devonport dock yard on the 6th March, her days as an AMC over. When she emerged she had a new role and a new name, HMS Artifex.
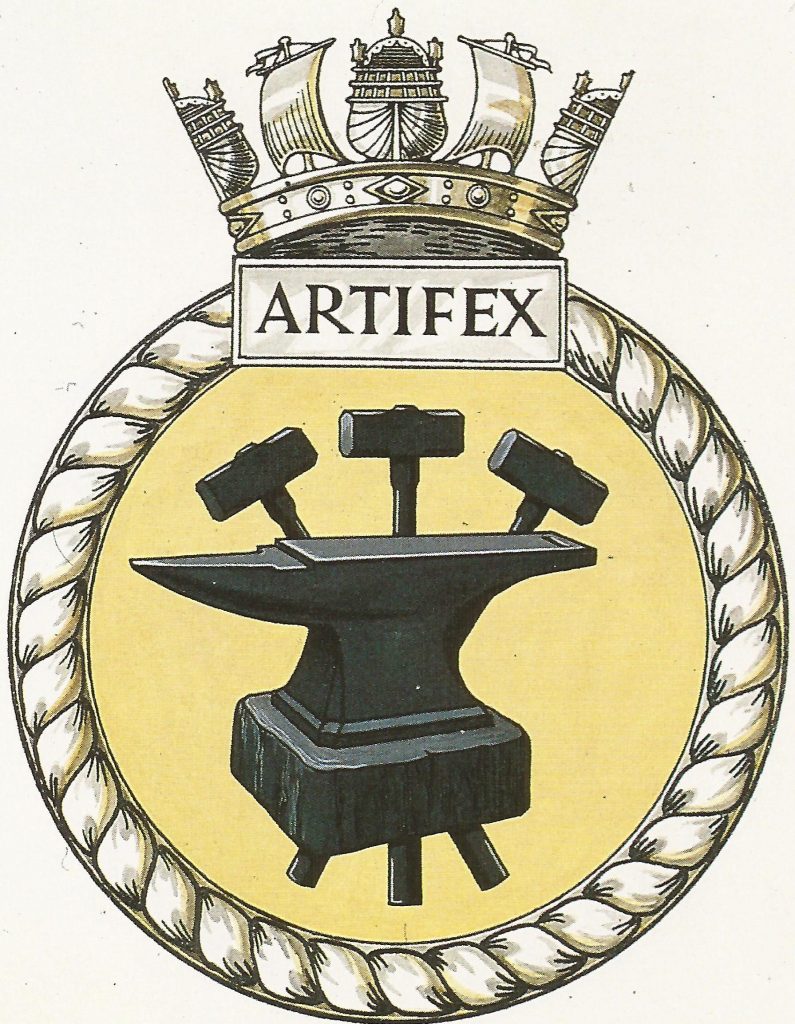
The former HMS Aurania was issued with at new ships crest as HMS Artifex. The crest consisted of a gold blazon with 3 blacksmiths hammers, one erect and the other two in saltire, surrounded by an anvil, all black. Artifex is Latin for artificer and the design of the crest alludes to the role of the ship.
HMS Artifex seen here in the background at Portsmouth just prior to D-Day. The photograph taken on the 26th May 1944 also shows (from right to left) the paddle tug HMT Grappler, Tank Landing Ship HMS LST 302 and the Captain Class frigates HMS Trollope (center) and HMS Lawford. A ‘Flamer Class tug in foreground discharging ash into a hopper.
HMS Artifex on the 18th May 1944 prior to deployment to the Far East. (Copyright Imperial War Museum)
HMS Artifex on the 18th May 1944 prior to deployment to the Far East. (Copyright Imperial War Museum)
HMS Artifex on the 18th May 1944 prior to deployment to the Far East. (Copyright Imperial War Museum)

HMS Artifex on the 18th May 1944 prior to deployment to the Far East. (Copyright Imperial War Museum)
HMS Artifex late 1944 prior to deployment to the Far East
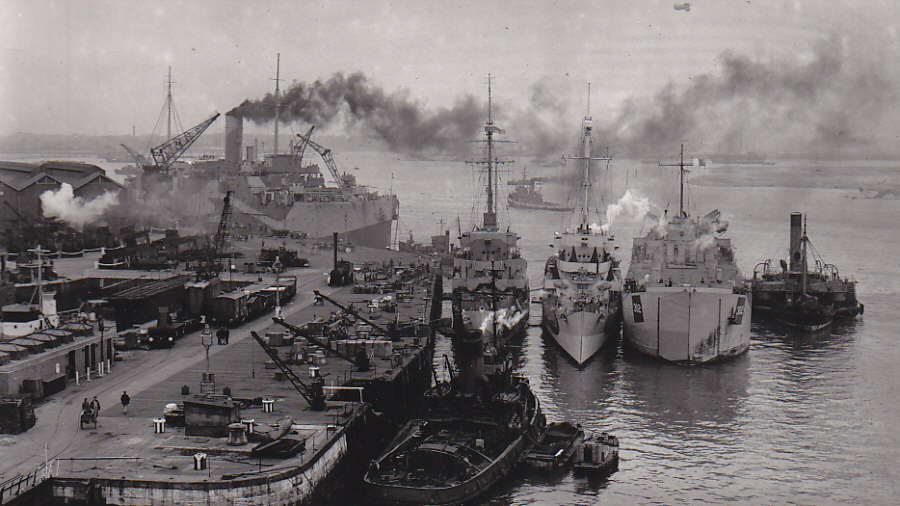
On 10 May 1944 the work was complete and she was re-commissioned at Plymouth as the heavy repair ship HMS Artifex. After carrying out trials she was prepared for service in the Pacific theatre. She sailed to Trincomalee to join the British Pacific Fleet in January 1945, and by March was being deployed out of Manus in the Admiralty Islands as part of the British Fleet Train, (Task Force 112), supporting the ships of Task Force 57, British Pacific Fleet. Artifex took passage to Leyte on 19th April to support ships involved in the attacks against the airfields in the Sakishima-Gunto Islands. She remained here throughout April and much of May, sailing for Manus again on 20th May for support of the planned operations by Task Force 57 ships in Japanese waters. She remained at Manus until Royal Navy ships returned to Australia after their withdrawal from operations with Task Force 36 in August 1945.
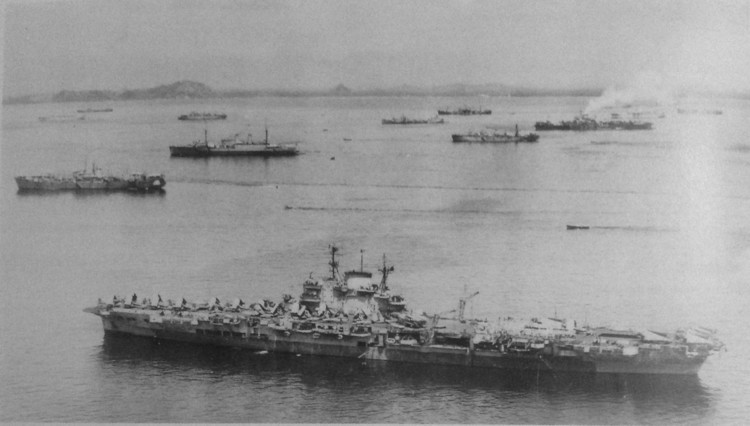
The fleet at Manus with HMS Victorious in the centre
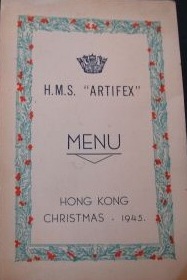
The 1945 Christmas menu for HMS Artifex. She had been sent to Hong Kong with emergency medical supplies and to repair the hospital. While there, here crew also repaired the tramway system, generators and other local services.
HMS Artifex was initially deployed to Manus in the Admiralty Islands from where she supported ships of Task Force 57

HMS Artifex in Brisbane’s Cairncross Dry Dock 21st Feb 1946.
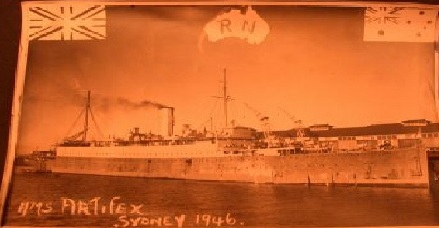
HMS Artifex seen here at Sydney in July 1946
In May 1946 she left the Far East Fleet and returned to Cardiff where most of its crew were redeployed. In June she was sent to Gareloch to join the reserve fleet. In 1948 she was assigned to the training establishment HMS Caledonia at Rosyth, which was used to train artificer apprentices. In 1955 Artifex was paid off into the reserve fleet. She continued to be based at HMS Caledonia though as a tender. She was finally laid up at the dockyard and placed on the disposal list. She was eventually sold to British Steel (BISCO) and on the 28th December 1960 and departed Rosyth under tow on the 7th January 1961, bound for the Italian ship breakers at La Spezia, Italy.
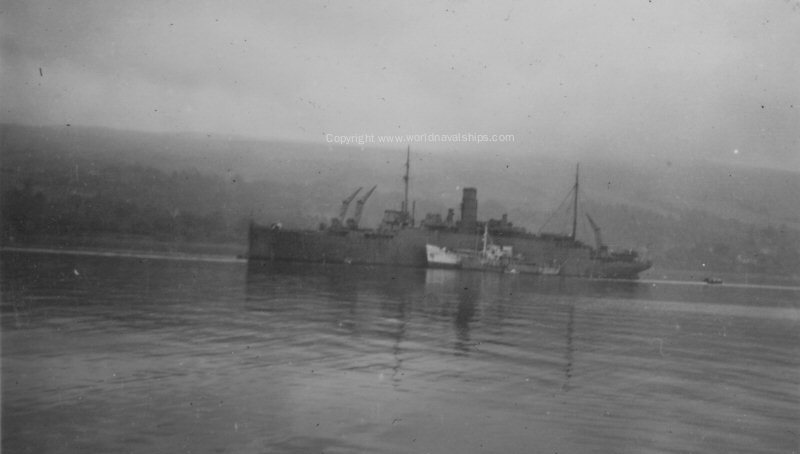
HMS Artifex seen here at Gareloch in July 1947 (Copyright World Naval Ships)
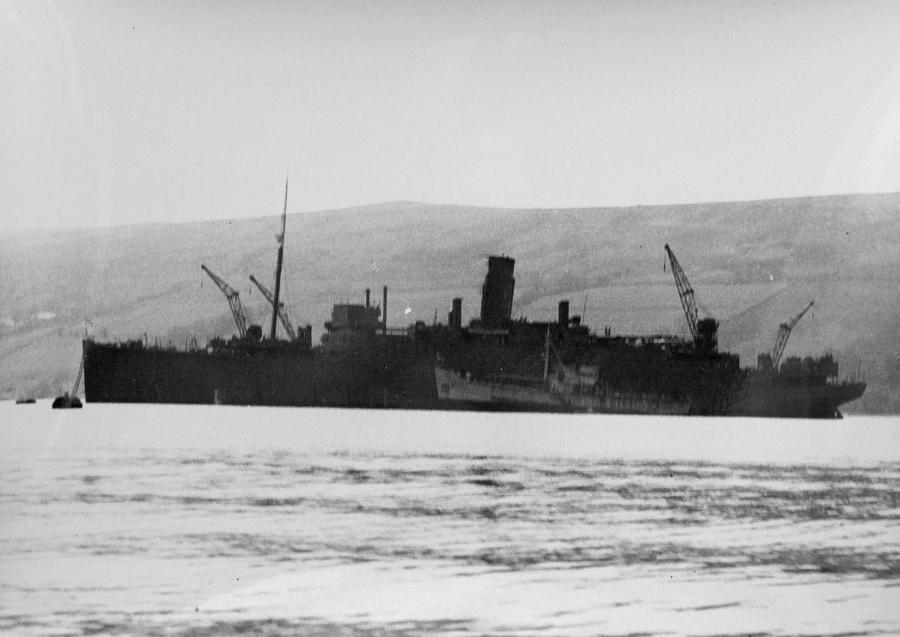
Another photograph of HMS Artifex at Gareloch in July 1947.
The British Pacific Fleet
In 1944 the defeat of Nazi Germany was assured and the threat posed by the German Kriegsmarine had diminished. Tremendous efforts commenced in Britain to put together a great fleet of warships which were initially to be based in Sydney and which was of course destined to take part in the war against Japan. Some ships, particularly submarines, had for some years been operating from Fremantle in Western Australia and a fleet had also been operating from the naval base in Trincomalee in Ceylon. This was the British Eastern Fleet later renamed the British East Indies Fleet. Scores of thousands of officers and ratings were allocated to these ships and they began fitting out these vast fleets for operations in the Pacific and Indian Oceans.
The British Pacific Fleet or BPF as it became known commenced operations against Japan initially by bombardments and air attacks from aircraft carriers whilst still on their way to Australia. These attacks were upon the Japanese occupied Netherlands East Indies. For their operations against Okinawa and mainland Japan the Royal Navy operated an extensive Fleet Train. This consisted of dozens of supply ships, oil fuel tankers and floating workshops, also submarine depot ships and other assorted types of vessels. The need for this Fleet Train was necessitated by the immense distances from Sydney to the areas of operations.
The Fleet itself comprised 336 ships which included: 17 aircraft carriers – ranging from Fleet Carriers, Light Fleet Carriers to Escort Carriers, 4 Battleships, 10 cruisers, 40 destroyers, 18 Sloops, 13 Frigates, 29 Submarines, 35 Minesweepers and many other specialist type vessels such as Hospital Ships, Salvage ships, Landing ships, Armament Carriers and Fleet Repair Ships, including HMS Artifex. These figures are for the BPF and do not include the East Indies Fleet, which whilst not as large as the BPF, was still was a very potent force comprising of many more Aircraft Carriers, Battleships, Cruisers, Destroyers, Submarines etc. making the British contribution to the assault upon Japan, was very significant.
The BPF became part of the United States Navy’s Task Force 57 later being designated part of Task Force 37. The Fleet took part in operations against targets leading up to the final assault upon the mainland islands of Japan. These included the vicious battle for Okinawa during which all of the British Fleet carriers suffered hits by Japanese Kamikaze suicide planes, however unlike their US allies, whose carriers had wooden flight decks and were put completely out of action when hit, the British carriers had armored flight decks and following hasty repairs, the carriers were once again flying off strikes.
The British East Indies Fleet covered the area from the east coast of Africa to the west coast of Australia and played an important part in the recapture of Burma from the Japanese. Ships from this fleet took the surrender from Japanese garrisons throughout South East Asia from the Andaman Islands to Malaya and the Netherlands East Indies.
Both the British Pacific and East Indies Fleets became known in time as The Forgotten Fleets. In the euphoria of the victory in Europe the existence of these ships far from home was little known in Britain, and even today most know little of their contribution to the final victory over Japan.